软件:ZABBIX3.4.0
操作系统:cent OS 7
环境准备
安装依赖包
1 | yum -y install wget net-snmp-devel OpenIPMI-devel httpd openssl-devel java lrzsz fping-devel libcurl-devel perl-DBI pcre-devel libxml2 libxml2-devel mysql-devel gcc php php-bcmath php-gd php-xml php-mbstring php-ldap php-mysql.x86_64 php-pear php-xmlrpc net-tools wget vim-enhanced |
关闭防火墙
1 | systemctl stop firewalld.service |
关闭SELINUX
1 | sed -i "s/SELINUX=enforcing/SELINUX=disabled/g" /etc/selinux/config |
搭建LAMP环境
1 | yum -y install mariadb mariadb-server php php-mysql httpd |
MYSQL配置
1 | systemctl enable mariadb.service # 开机自启 |
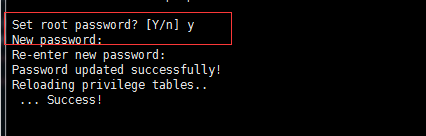
初始化MySQL数据库,配置root用户密码
1 | mysql_secure_installation |
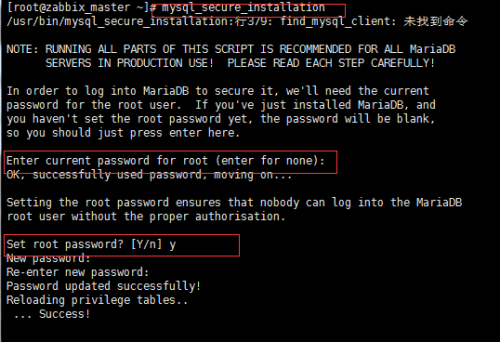
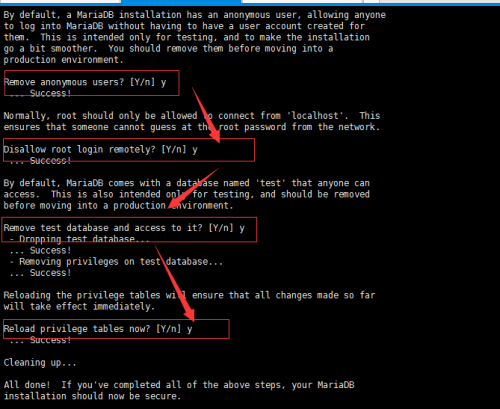
Remove anonymous users? 删除匿名用户?
Disallow root login remotely? 禁止root远程登陆
Remove test database and access to it? 删除测试数据库并且和访问它
Reload privilege tables now? 重新载入特权表
创建zabbix数据库及其用户
1 | mysql -uroot -p123456 -e "create database zabbix default character set utf8 collate utf8_bin;" |
启动Apache
1 | systemctl start httpd.service |
编译安装zabbix server 3.4
安装zabbix守护进程
下载tar包
https://www.zabbix.com/download
1 | tar -zxvf zabbix-3.4.0.tar.gz |
创建用户账户
1 | groupadd zabbix |
配置源代码
1 | ./configure --prefix=/data/server/zabbix --enable-server --enable-agent --with-mysql --enable-ipv6 --with-net-snmp --with-libcurl --with-libxml2 |
安装
1 | make install |
数据库导入zabbix template
使用数据库用户zabbix登录数据库
1 | mysql –uzabbix –p |
切换到zabbix数据库
1 | use zabbix |
按顺序导入模板数据
1 | source /usr/local/src/zabbix-3.4.0/database/mysql/schema.sql |
查看和编辑配置文件
1 | vi /data/server/zabbix/etc/zabbix/zabbix_server.conf |
配置PHP
1 | vim /etc/php.ini |
安装zabbix web界面
1 | mkdir /var/www/html/zabbix |
启动zabbix-server
1 | systemctl start zabbix-server.service |
配置zabbix
1
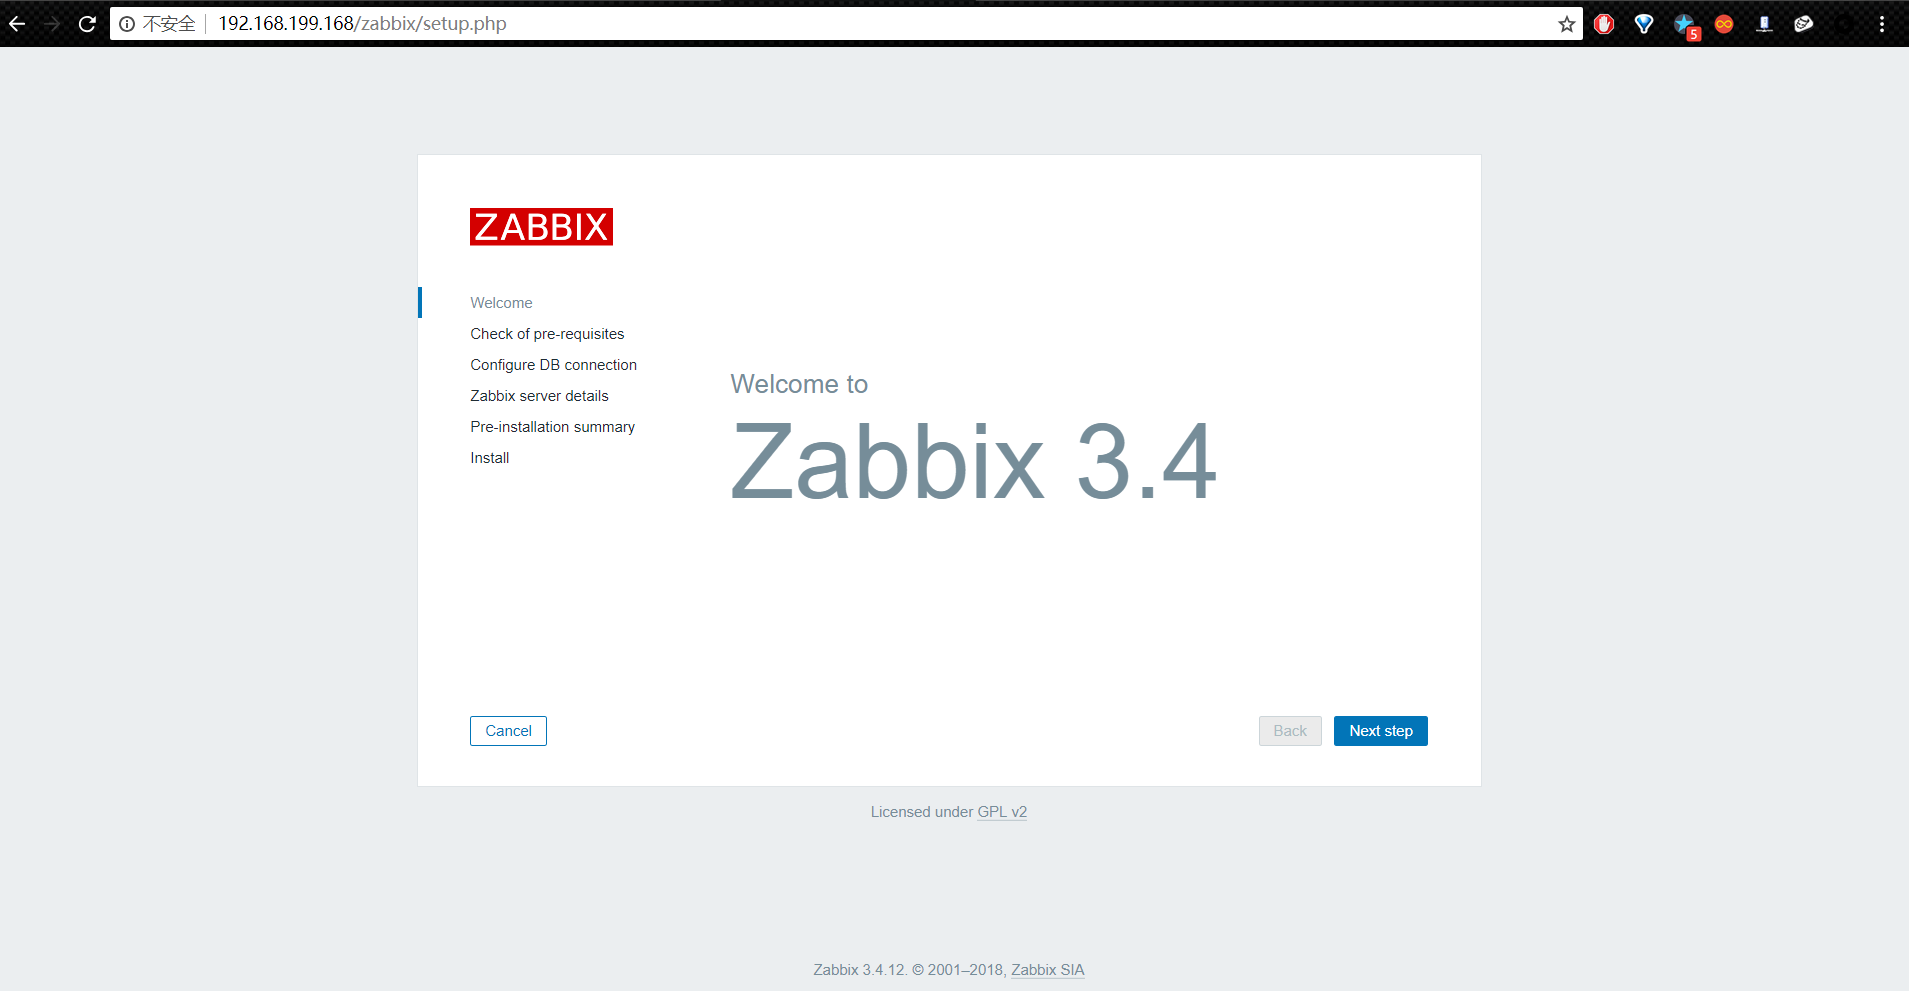
2
确认满足所有的软件安装前置条件,如果下图这些显示Failed,那么我们编辑/etc/php.ini,将下图中的配置项都改成要求的大小,未配置的项进行手动添加
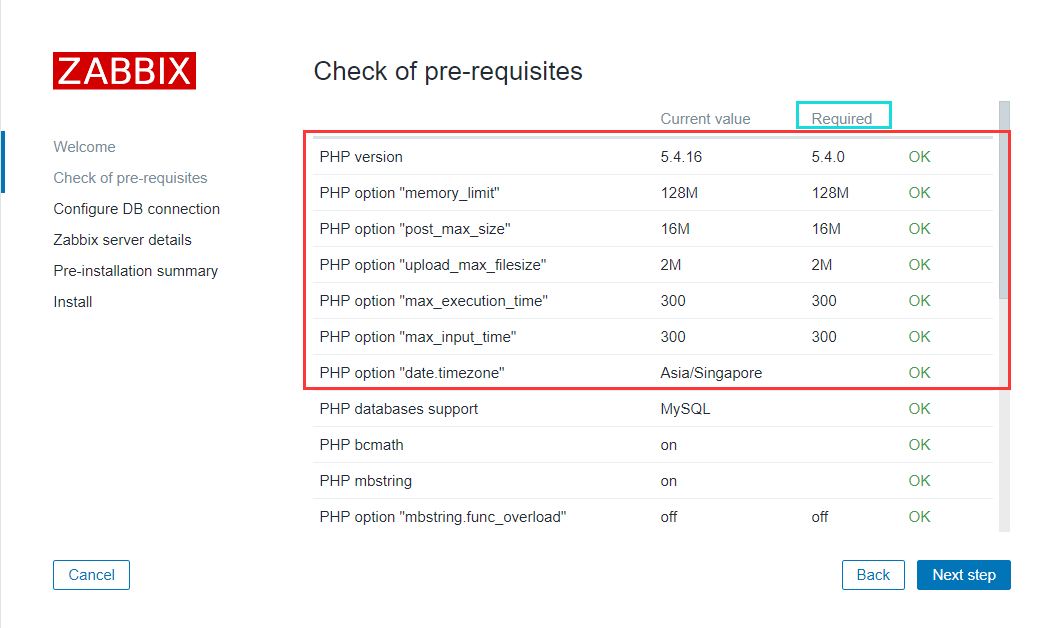
如果出现PHP xmlwiter,PHP smlreader off那么请键入下条命令
1 | yum install php-bcmath php-mbstring php-xmlwriter php-xmlreader |
3
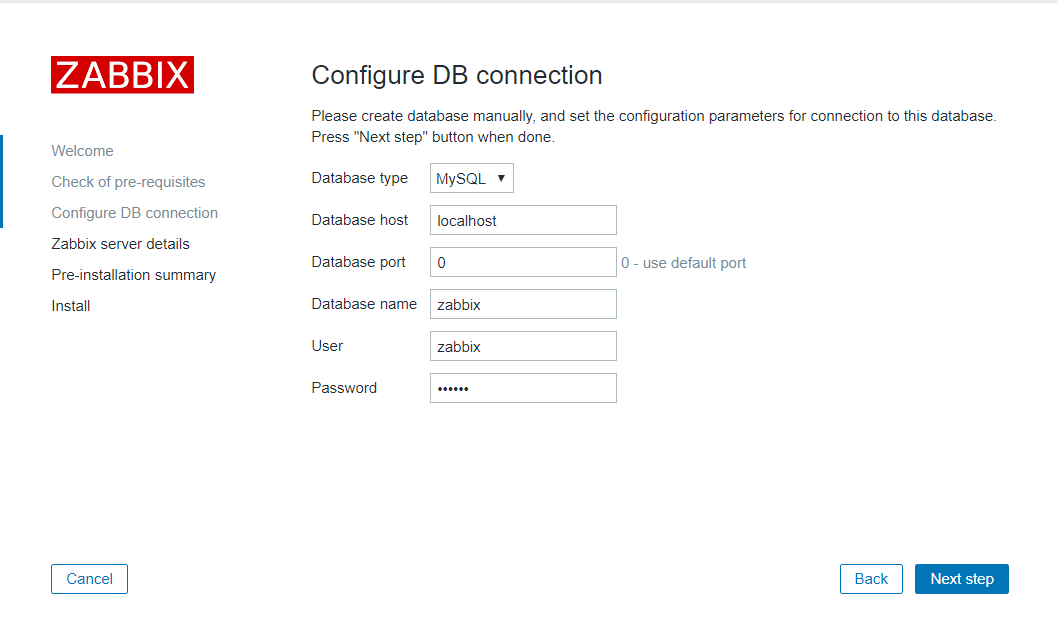
输入连接数据库的详细信息。Zabbix数据库必须是已经创建好的。
4
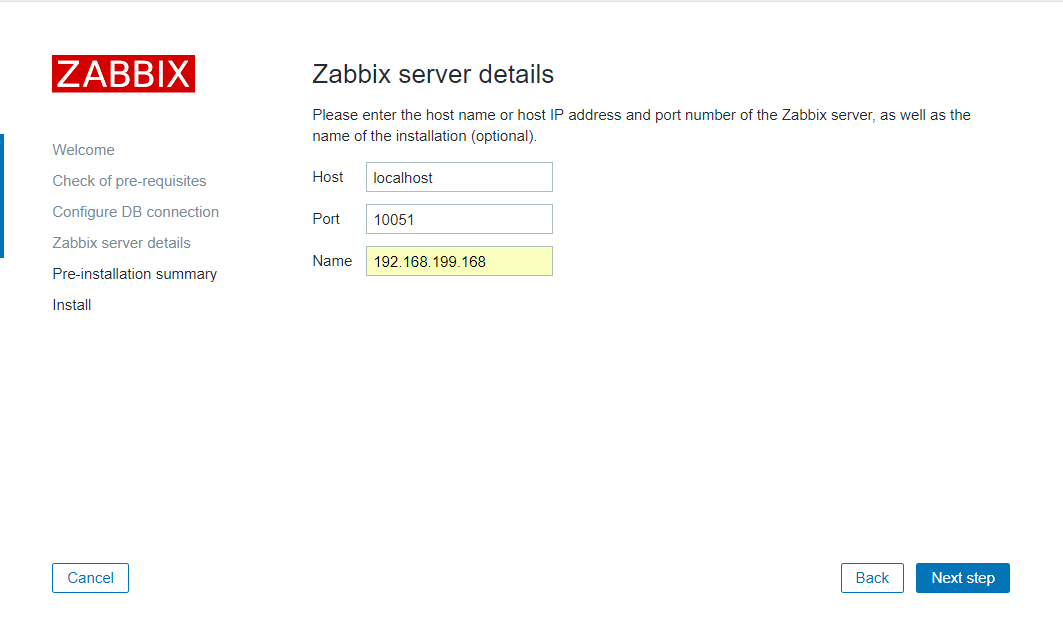
输入Zabbix Server的详细信息。
5
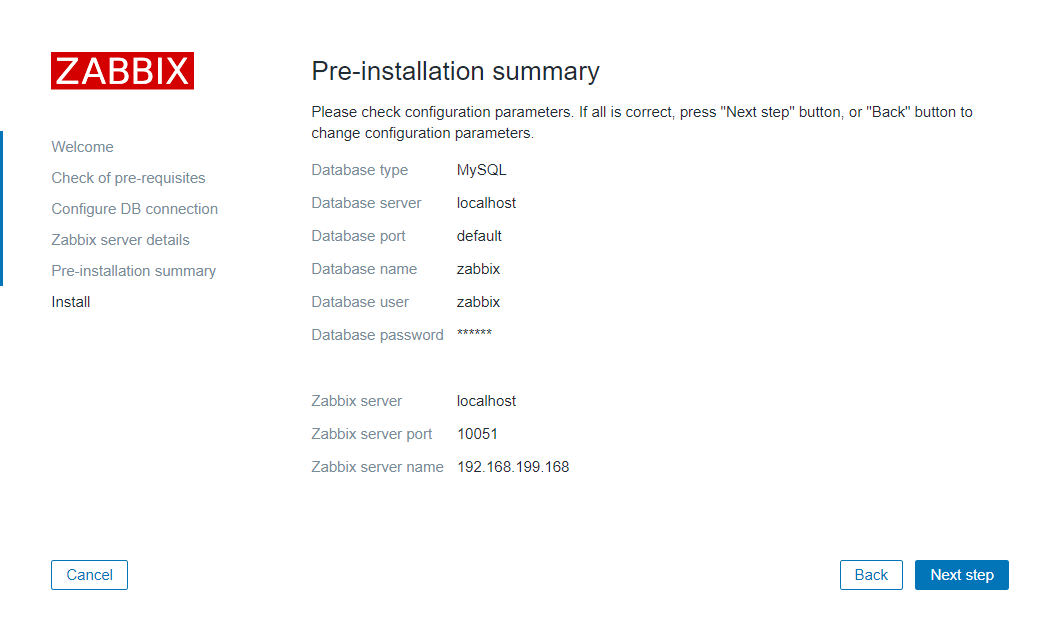
检查设置信息。
6

1 | cd /var/www/html/zabbix/conf |
7
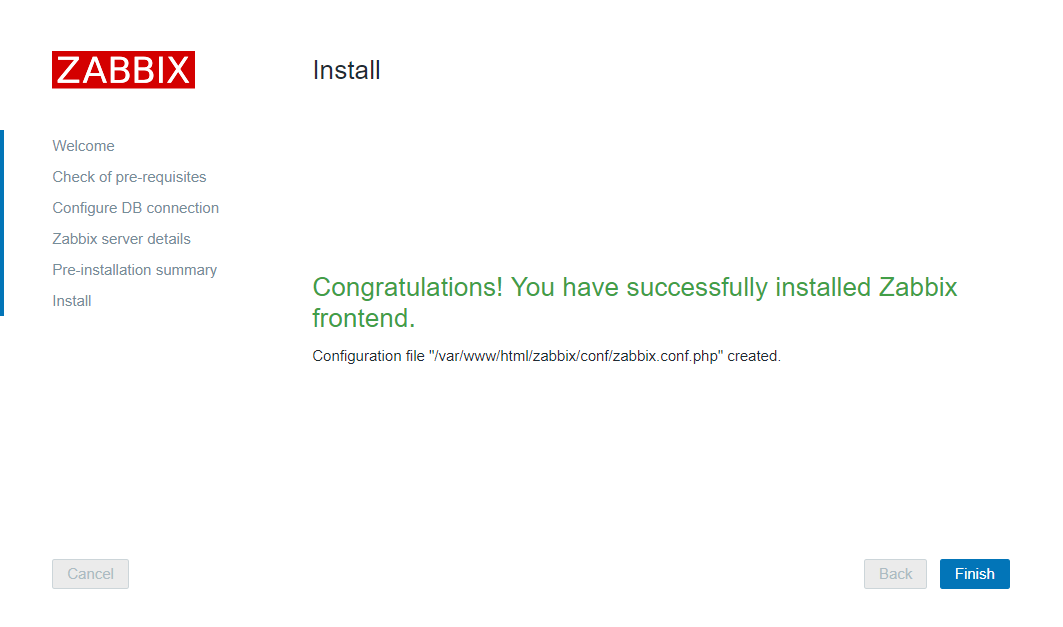
上传完毕后,完成安装。
8
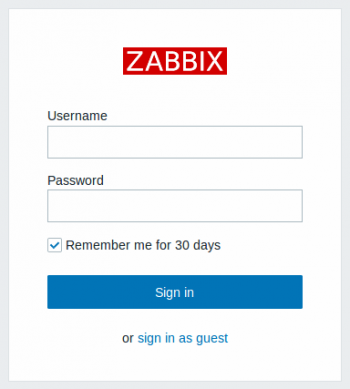
Zabbix前端已经就绪!默认的用户名是Admin,密码是zabbix。
配置zabbix-agent
安装
1 | rpm -ivh http://mirrors.aliyun.com/zabbix/zabbix/3.0/rhel/6/x86_64/zabbix-release-3.0-1.el6.noarch.rpm |
修改配置文件
1 | vim /data/server/zabbix/etc/zabbix_agentd.conf |
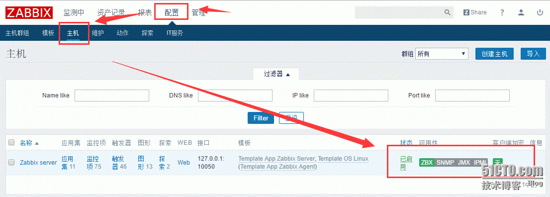
在zabbix web端添加该监控机器时,只需要把honst name与该配置文件中的Hostname对应即可
启动
1 | cd /data/server/zabbix/bin |
官方安装文档:https://www.zabbix.com/documentation/3.4/zh/manual/installation/install
排错参考网址:https://www.tuicool.com/articles/bayqqim
https://blog.csdn.net/weixin_39366112/article/details/78164049?locationNum=8&fps=1